Set up Sync
You can sync computers using the Automatic Backups feature and a cloud drive like OneDrive or Dropbox.
Set up your cloud drive
- Computers running Windows 10 and 11 come with OneDrive built-in, so you do not have to install the app separately. If you prefer to use Dropbox or another service, you need to install the app from their website.
- On the cloud app, sign in to your account. It is important that you sign in to the same account on all computers so that you can see the same files across all of them.
- Repeat steps 1 through 2 for all computers you wish to sync.
Configure Stenaura on your first computer
This section will guide you through configuring sync on your first computer. If you are returning to this guide wanting to configure a third or fourth computer, go to the next section.
- On your computer, in the Stenaura app, go to Special > Backup & Restore from the top menu and click "Settings."
- Tick the "Enable" checkbox. A folder picker dialog will appear.
- In the folder picker, navigate to your cloud drive, and create a new folder called Stenaura Backups. Double-click this new folder and then click "Select Folder."
-
Tick the "Show auto-restore prompt on startup" checkbox.
Your settings will now look like this.
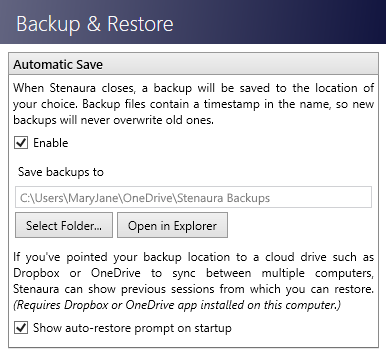
- Click "Save."
- Close the app. The app will save a backup file to your Stenaura Backups folder you created earlier. Check your cloud drive to make sure it's there.
Configure Stenaura on your other computers
- Download and install the Stenaura app on your computer if you have not already done so. You can find your activation key in your account.
- Go to Special > Backup & Restore and click "Restore." You will receive a warning about overwriting currently loaded information. Click "Yes" to ignore it.
- Select the backup file from your Stenaura Backups folder you created earlier in your cloud drive. If there are multiple files, select the most recent one.
- Your backup file is now loaded. You can navigate to your Invoices and Attendance screens and see that your data is there.
- Go to Special > Backup & Restore and click "Settings."
- Tick the "Enable" checkbox. A folder picker dialog will appear. Navigate to your Stenaura Backups folder and click "Select Folder."
-
Tick the "Show auto-restore prompt on startup" checkbox.
Your settings will now look like this.
- Click "Save."
- For any additional computers you would like to sync, go to step 1.
Restoring sessions
At this point, your computers are configured to sync with each other. Now when you launch the app, it will ask you to select a session to restore.
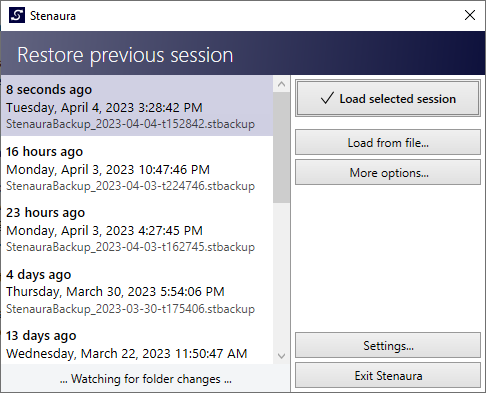
The most recent session appears at the top of the list. Click "Load selected session" to open it.
This feature depends on how quickly your cloud drive is able to sync, so it can take up to a few minutes to fetch the most recent file if you've just turned on your computer. Note that the entries have a timestamp, like "16 hours ago." If this timestamp is unusually old, for example, "13 days ago," and you know that you last used the app only yesterday, wait a few moments for the newer file to appear in the list.